

How To Set Up An Above Ground Sprinkler System
Brand an above-ground sprinkler system using PVC piping and some sprinkler heads. Below is the step-by-footstep tutorial.
Human being it's hot outside, and my thou shows it! Yard piece of work is not my favorite affair and our poor lawn has been losing it's gorgeous green from spring and is starting to look dry and brownish.
We needed to figure something out for watering. The previous owners put in a sprinkler system but information technology has never worked, and replacing the whole system is out of our budget.
One of hubby'southward friends at work had made a sprinkler out of PVC pipe and hubby was certain he could make one too!
Nosotros headed to Home Depot and brought back all of our goodies and started building. We went in not knowing exactly what we needed or how to build information technology, but the Home Depot employee was very helpful then we knew exactly what to do.
More DIY Tutorials:
Why purchase it when you tin Do It Yourself? Don't worry, we have lots of tutorials to testify you how! Like this Custom Craft Tabular array, this Sometime Office Chair Redo, and the Chevron Foot Rest.
Be sure to look around the blog for more DIY tutorial ideas!
Supplies You lot'll Need to Create this Project:
This post contains affiliate links.
- x-foot ¾" PVC Pipage cut in half (2, v-pes pieces)
- 2-human foot ¾" PVC Pipe cut in one-half (2, 1-foot pieces)
- PVC Piping Cement
- Plumbers Record
- 2 Sprinkler Heads
- 3 Threaded Cap
- iii Male Thread Adapter
- 2 Shut Riser
- 2 Elbows
- 1 Cross-Department
- 1 Hose Adapter
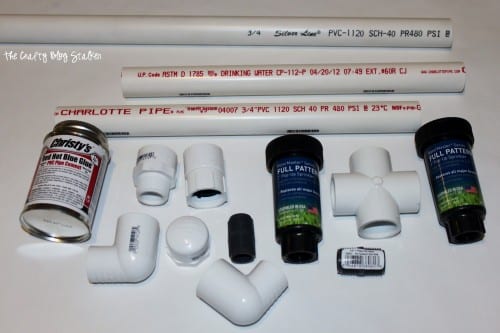
*I tried to use the correct verbiage for all of the different pieces, but this was our first time working with PVC, so if I named something wrong I am sorry.*
Above-Ground Sprinkler Tutorial:
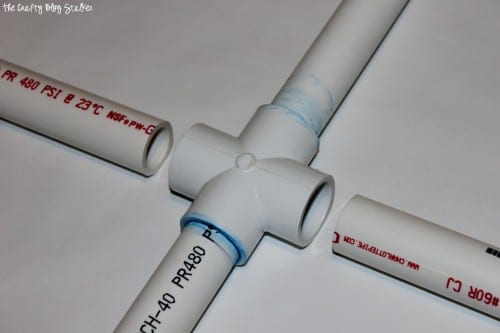
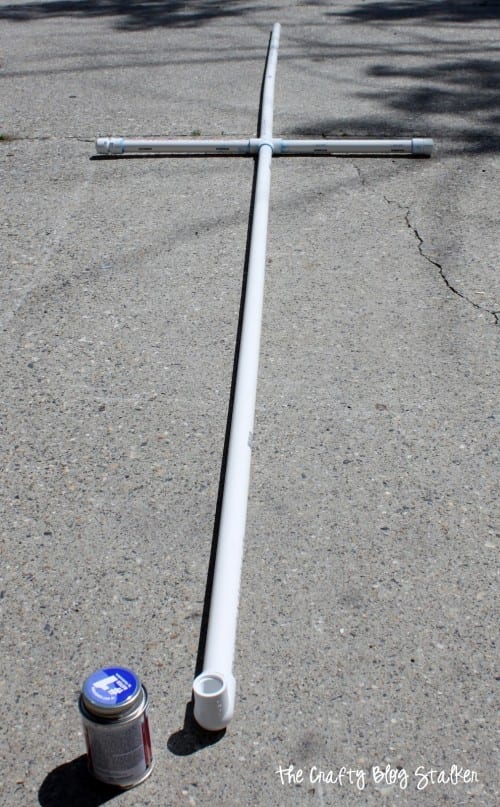
Start past gluing the longer ends to the cross-department. You want to glue the inside of the piece you are attaching it to and the exterior of the pipe that is going into the slice.

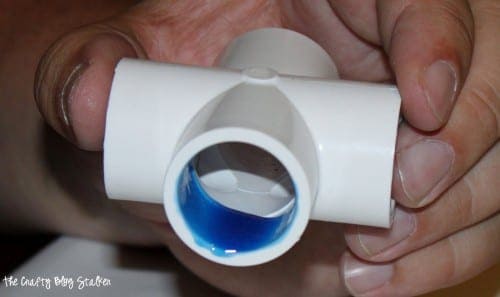
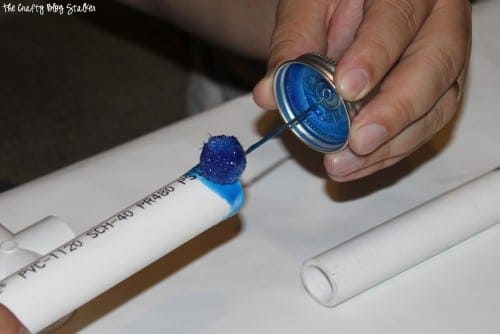

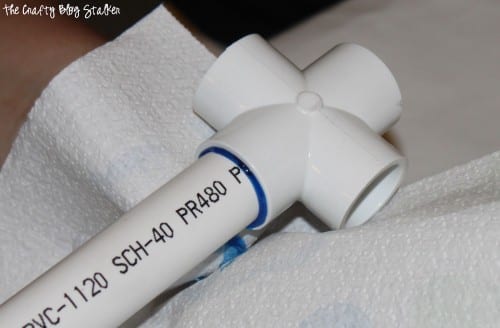
Gum the shorter pieces across from each other using the same method every bit earlier into the cantankerous-section.
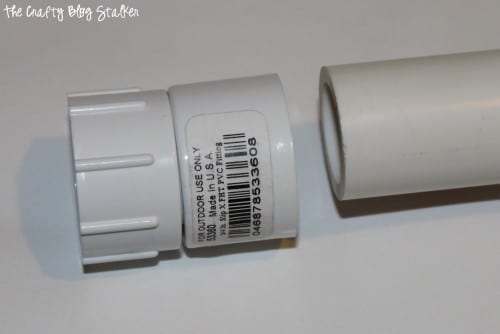
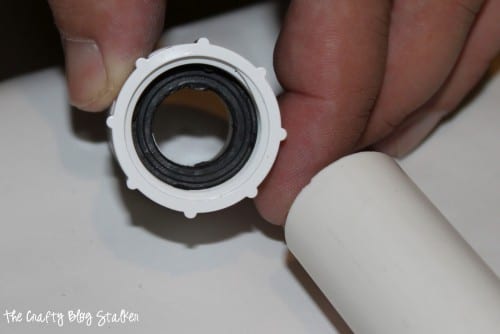
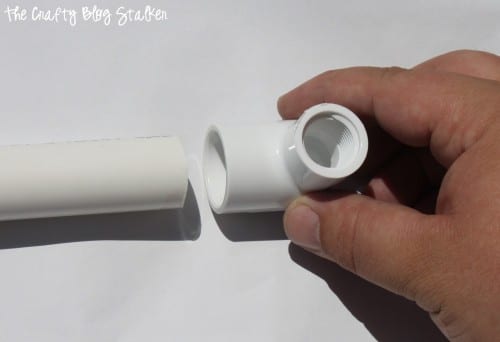
On one of the brusque pipes glue on a threaded cap using the same glue method.
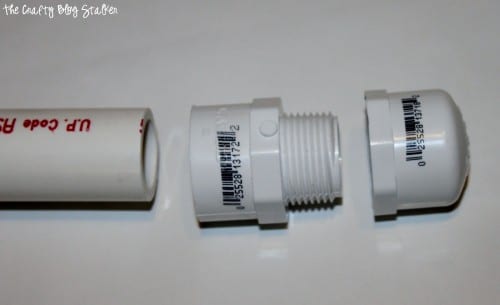
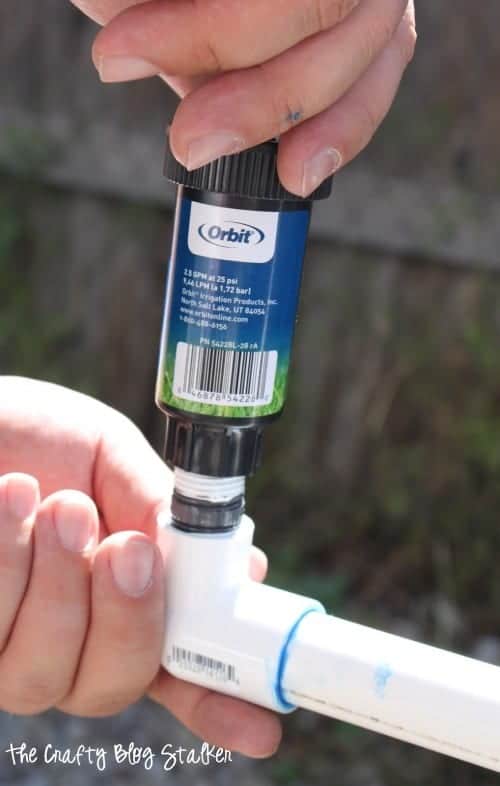
On the other terminate of the curt pipe glue the hose adapter making sure the top still rotates freely after you have glued it.
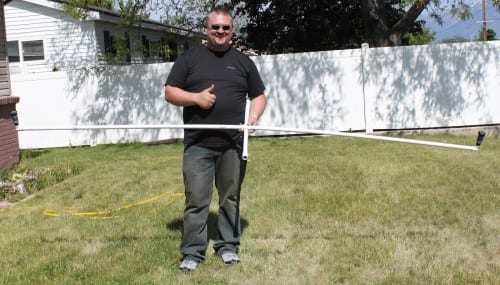
This is what it should look like at this point.
Glue the elbows onto the ends of the long pieces. This is for the sprinkler heads.
Wrap Thread Seal Tape around both male person ends of the adapter.

Spiral the adapters into the elbow and tighten with adaptable pliers to make it nice and tight.

Screw the sprinkler head into the adapter.
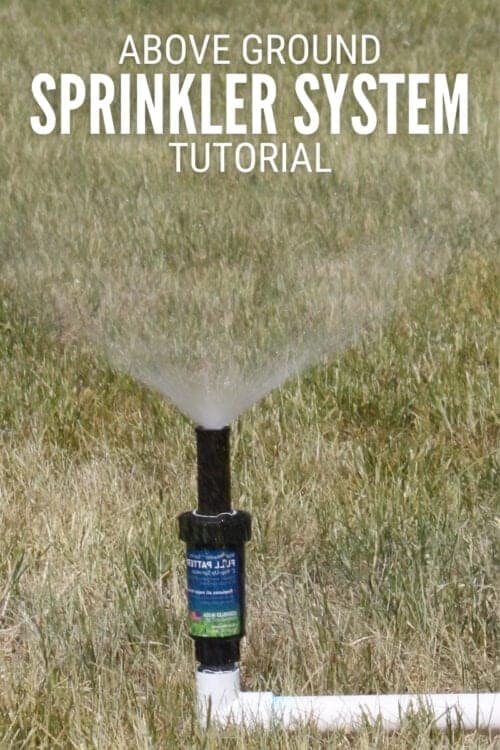
And voilà! You are all done!. The entire projection only took about thirty-45 minutes plus a bit more than for the drying time.
Information technology even works and everything!
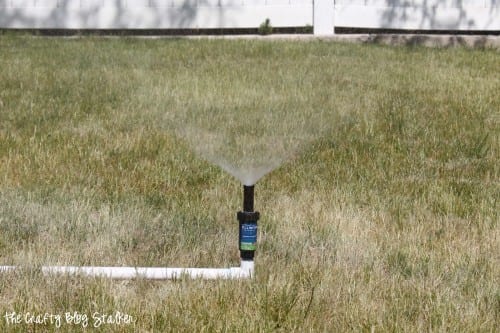
The kids idea that they needed to try it out and make sure everything worked OK besides.

If you dearest this sprinkler tutorial, please give it a five-star review and assistance me share it on Facebook and Pinterest!
Our Crafting Essentials List:
- So many of our crafts use a Cricut Motorcar, this is by far, my favorite tool! And there are dissimilar machines to choose from to fit every budget.
- Sharp pair of scissors are a must, and these Precision Edge Scissors are the best.
- Proceed your supplies and projects organized with these Stackable Storage Baskets.
Instructions
- Begin by gluing the longer ends to the cross-section. Y'all want to glue the inside of the piece you lot are attaching information technology to and the outside of the pipe that is going into the slice.
- Glue the shorter pieces beyond from each other using the same method as before into the cross-section.
- On one of the short pipes gum on a threaded cap using the aforementioned glue method.
- On the other stop of the brusque pipe glue the hose adapter making sure the top still rotates freely after you have glued information technology.
- Gum the elbows onto the ends of the long pieces. This is for the sprinkler heads.
- Wrap Thread Seal Tape effectually both male person ends of the adapter.
- Spiral the adapters into the elbow and tighten them with adjustable pliers to make them nice and tight.
- Screw the sprinkler caput into the adapter.
Notes
If you dear this sprinkler tutorial, please requite it a v-star review and assistance me share it on Facebook and Pinterest!
Follow The Crafty Blog Stalker
Reader Interactions

How To Set Up An Above Ground Sprinkler System,
Source: https://thecraftyblogstalker.com/diy-above-ground-sprinkler-system/
Posted by: denisbeids1974.blogspot.com
0 Response to "How To Set Up An Above Ground Sprinkler System"
Post a Comment